Introduction
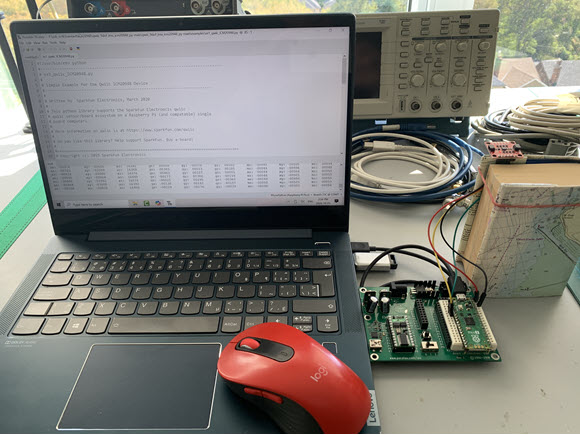
In previous posts I looked at using the ICM20948 9DOF IMU with Raspberry Pi4B and Arduino Uno (Ref.1/2). The ICM20948 is a replacement for the MPU9250 (now end of life) on the popular GY-91 board often used with OpenPlotter. The Raspberry Pi Pico 2 is a very small microcontroller that lends itself to remote sensor applications. With this in mind, I wanted to see how easy it was to interface the ICM20948 with the Pico 2 using either MicroPython or CircuitPython and using the Sparkfun breakout board (Ref.3).
Raspberry Pi Pico 2 to ICM20948 Connection
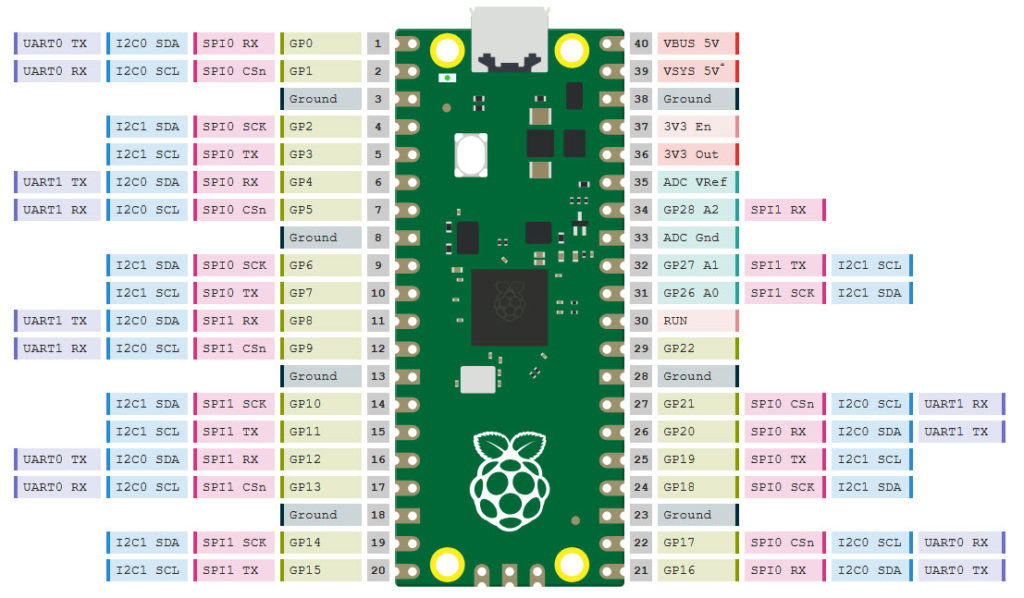
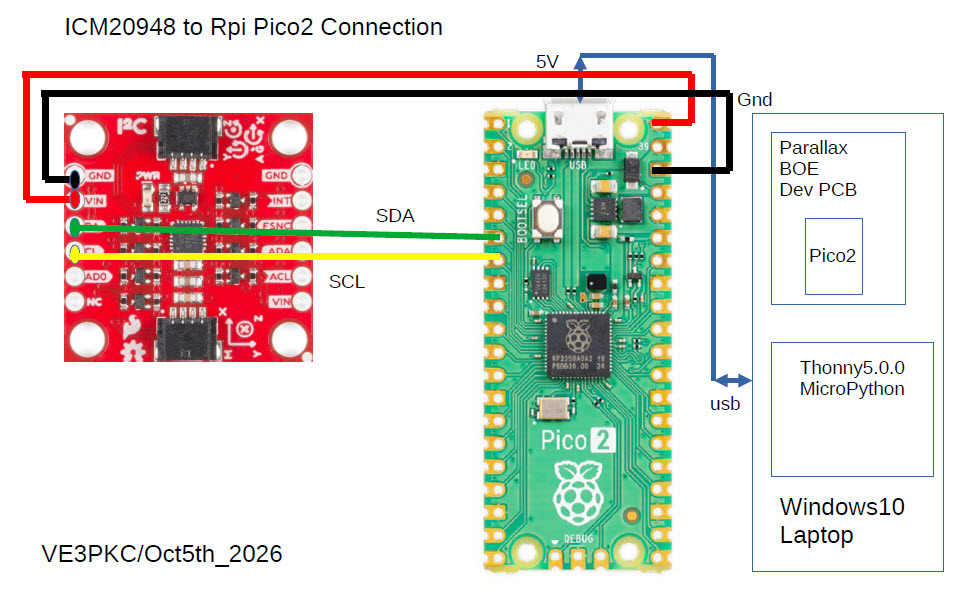
Figure 1 shows the pinouts for the Pico 2 as well as the pin assignments. Figure 2 shows the connections to the ICM20948 mounted on the protoboard of a Parallax BOE dev board. Power is supplied from the USB input connection on Pin40. Ground is on Pin38. SDA is connected to Pin6/I2C0_SDA and SCL is connected to Pin7/I2C0_SCL. Note that the Pico 2 has two separate I2C controllers.
MicroPython & Thonny Python IDE
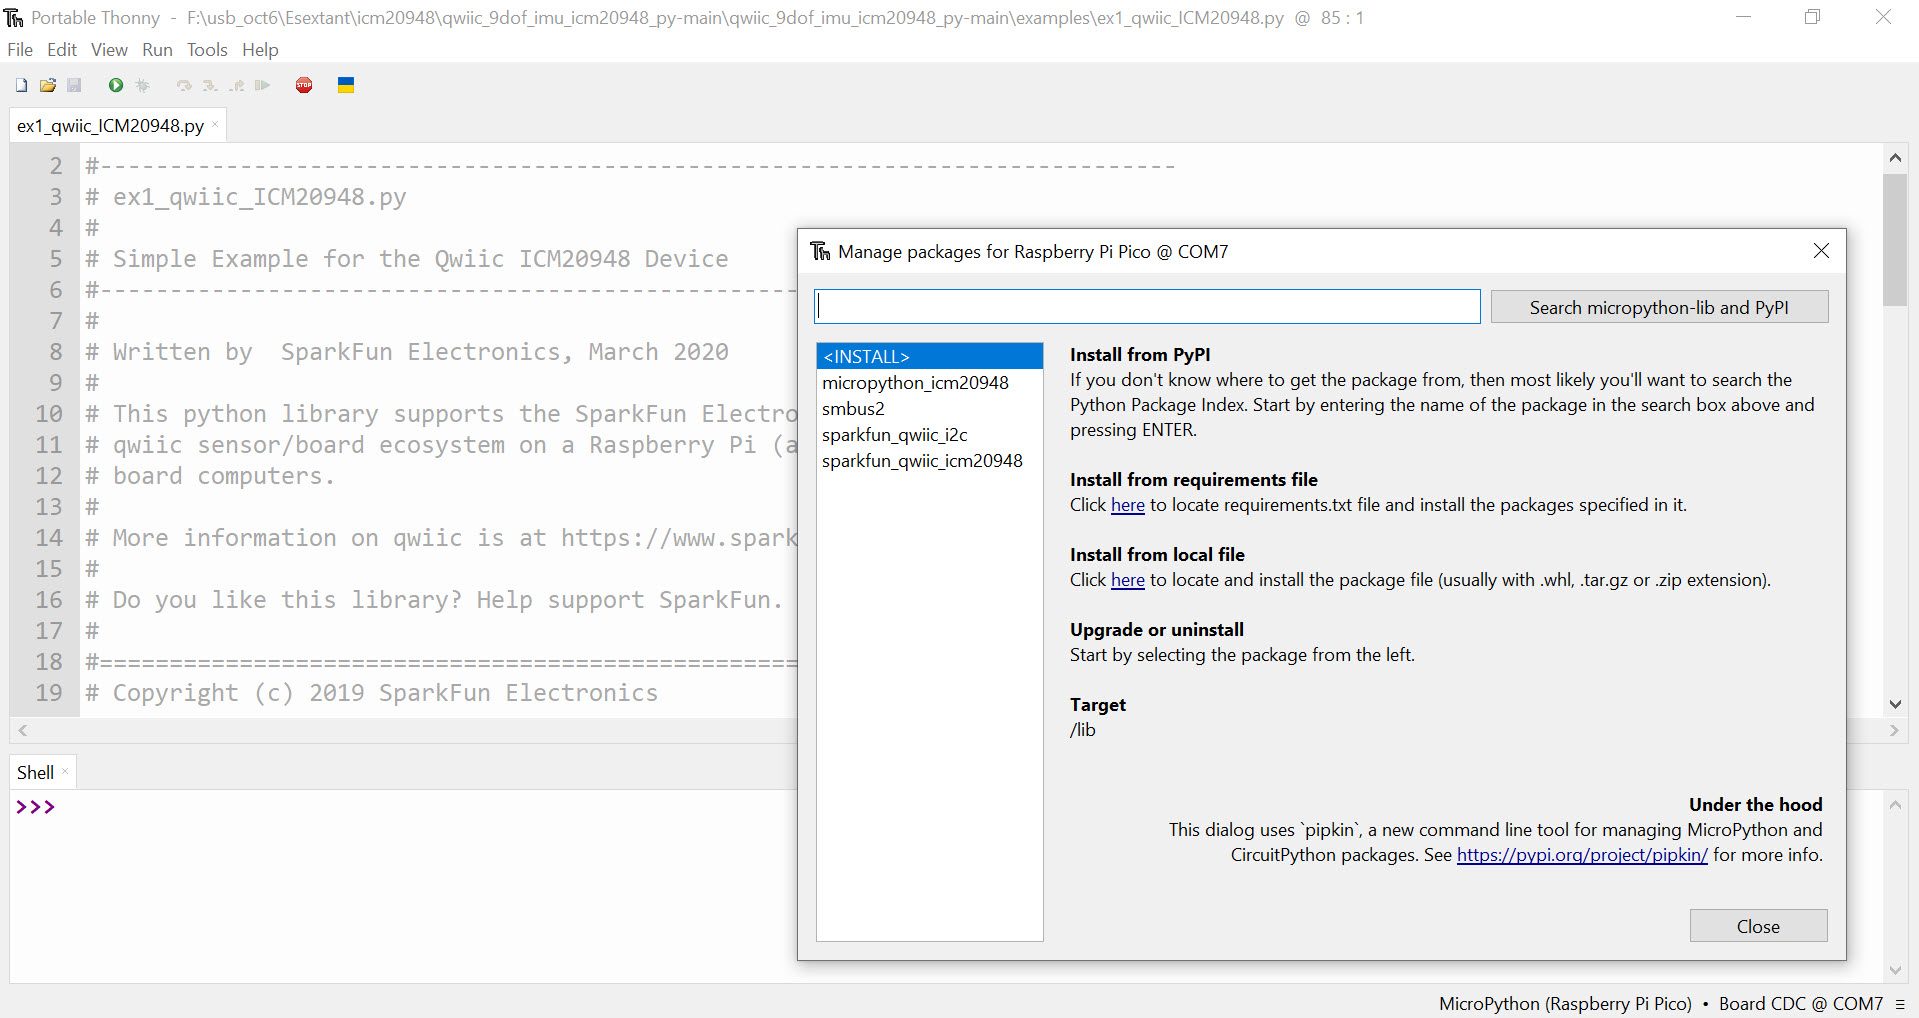
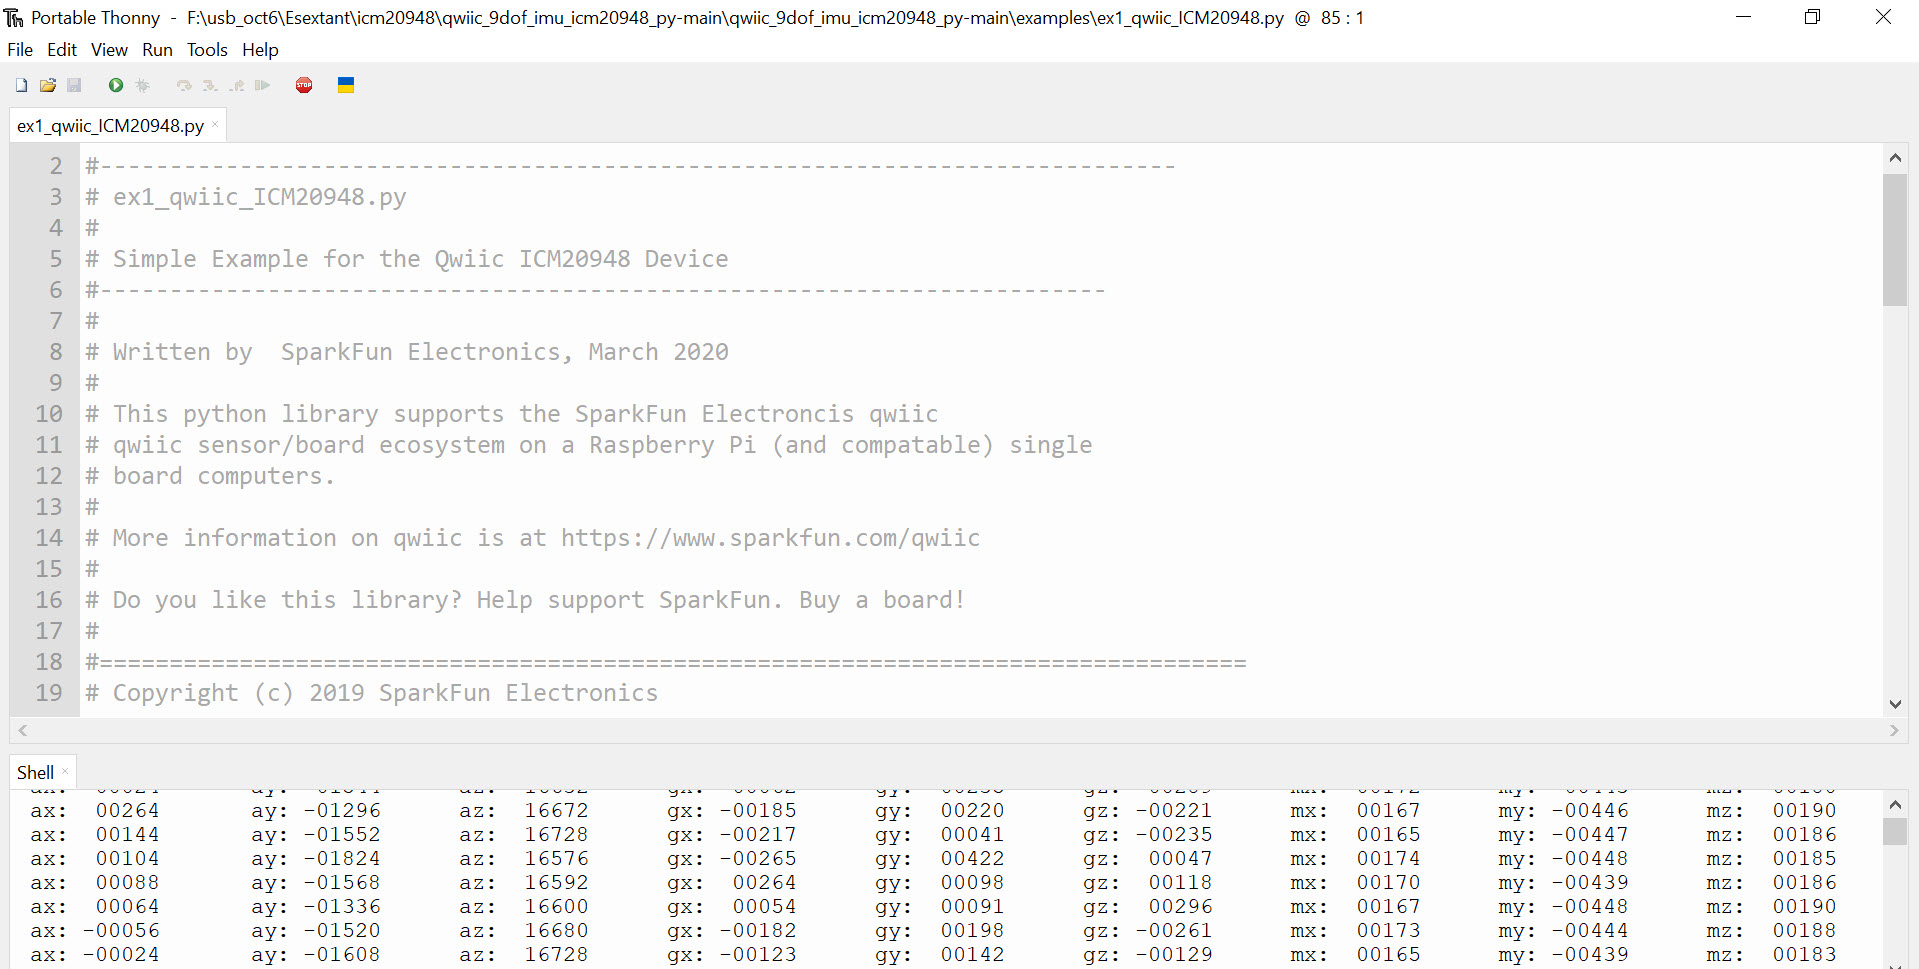

First download MicroPython for the Pico 2 from Ref.4. Hold down the BOOTSEL button on the Pico 2 and plug it into the laptop USB port. The Pico 2 uses a micro USB B connector. After 3 seconds let it go. The Pico 2 should now show as a drive with 2 files INDEX.HTM & INFO_UF2.TXT. Drag the downloaded MicroPython uf2 file onto this drive. The Pico 2 will now reboot. Figure 3 shows the Thonny IDE (portable version 5.0.0). used to run the MicroPython code for interfacing. On the bottom RHS of the Thonny display click to find “MicroPython (Raspberry Pi Pico).comxy”. The interface code is downloaded as a zip file from the SparkFun github repository (Ref.5). This is then loaded using Thonny Tools/Manage Packages/Install from local file. Select the downloaded zip file and Thonny will then install all the code/dependencies etc from the zip.
Figure 4 shows ex1_qwiic_ICM20948.py example running with the output displayed below in the shell area. In the example, the sensor is horizontal, so ax = ay = <1000 & az = 16400 approx. Figure 5 shows the sensitivity for the ICM20948 (Ref.6). Thus az = 16400/16384 * 9.81m/sec^2 = 9.82m/sec^2.
Please send your comments, questions and suggestions to:
contact:

References
#1. – “ICM20948 9DOF IMU on RaspberryPi4B”
https://jeremyclark.ca/wp/nav/icm20948-9dof-imu-on-raspberrypi4b/
#2. – “ICM20948 9DOF IMU on Arduino Uno”
https://jeremyclark.ca/wp/nav/icm20948-9dof-imu-on-arduino-uno/
#3. – “SparkFun 9DoF IMU Breakout – ICM-20948 (Qwiic)”
https://www.sparkfun.com/sparkfun-9dof-imu-breakout-icm-20948-qwiic.htm
#4. – “MicroPython”
https://micropython.org/download/
#5. – “SparkFun Qwiic 9DOF – Python Package”
https://github.com/sparkfun/Qwiic_9DoF_IMU_ICM20948_Py
#6. – “TDK Data Sheet ICM20948”
https://product.tdk.com/en/search/sensor/mortion-inertial/imu/info?part_no=ICM-20948
