Introduction
In the previous post I looked at interfacing the ICM20948 9DOF IMU with the Raspberry Pi Pico 2 (Ref.1). In this post I examine interfacing the Bosch BMA400 3 axis accelerometer with the Pico 2. The BMA400 breakout pcb is extremely small and lends itself to small portable instruments (Ref.2).
Raspberry Pi Pico 2 to BMA400 Connection
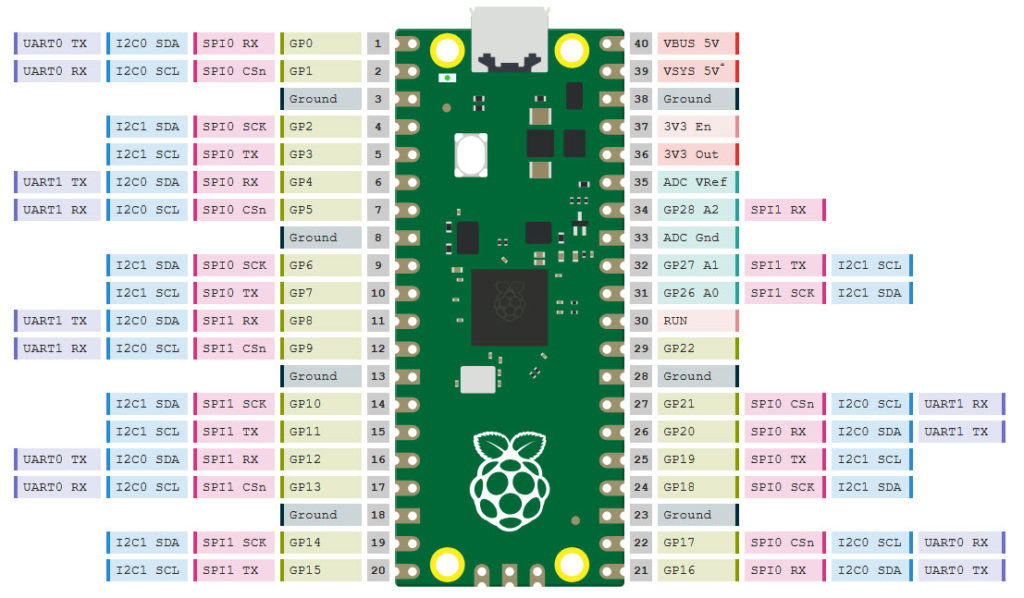
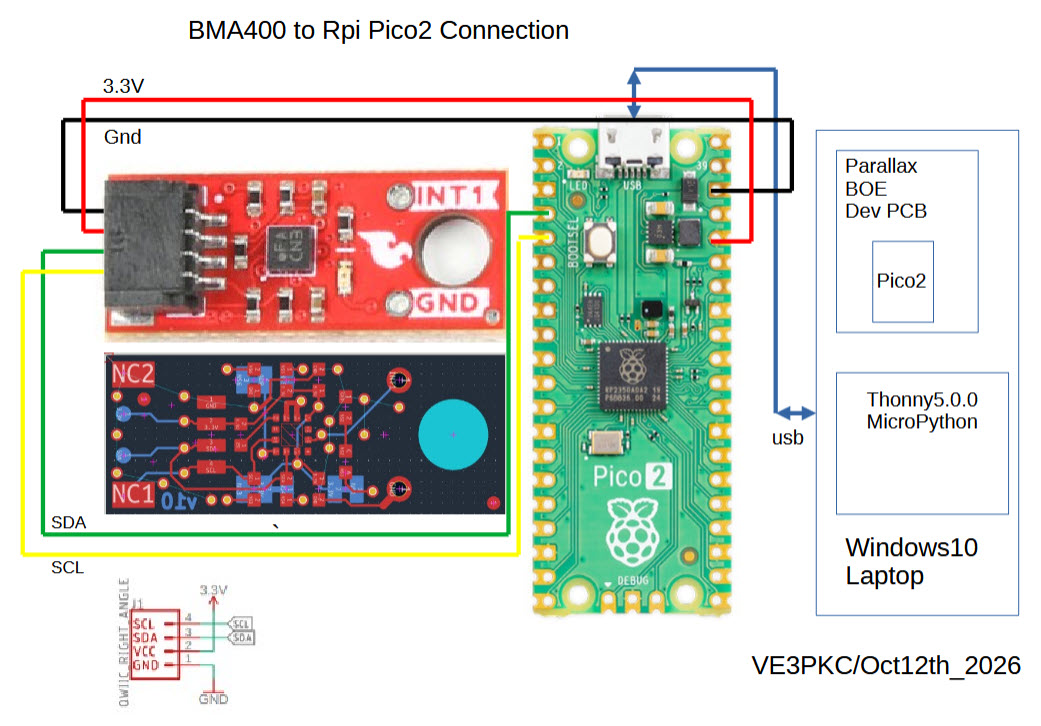
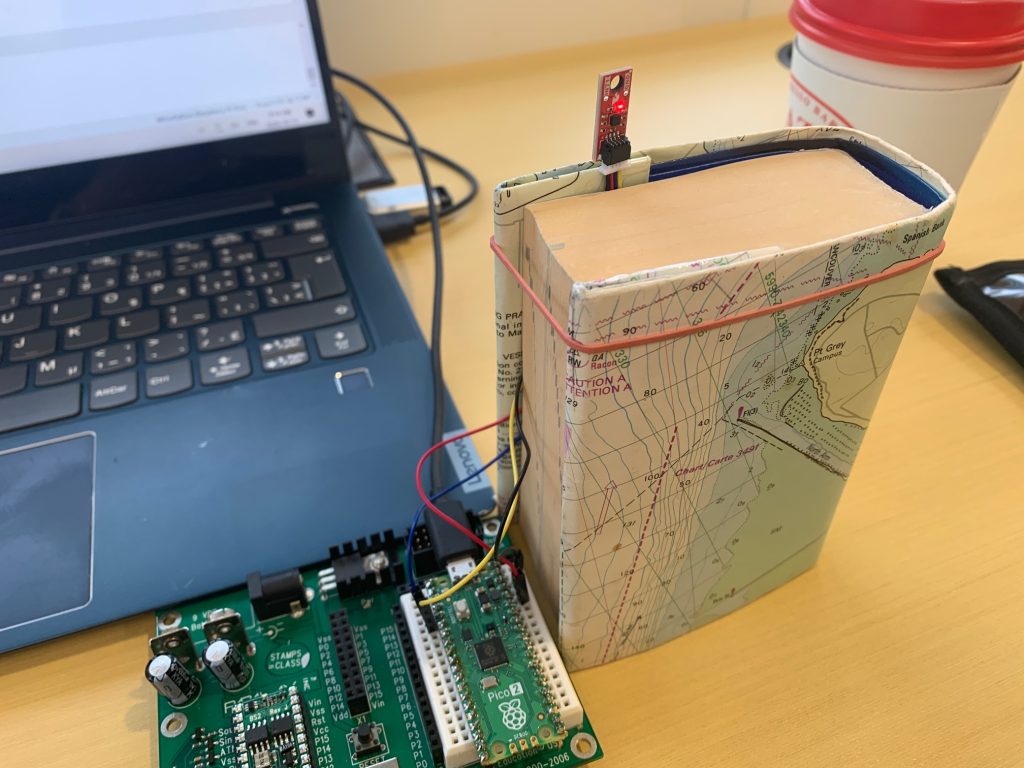
Figure 1 shows the pinouts for the Pico 2 as well as the pin assignments. Figure 2 shows the Pico 2 connections to the SparkFun BMA400 breakout (Ref.2). The Pico 2 is mounted on the protoboard of a Parallax BOE dev board. The top layout is shown as well as a KiCad view of the pcb wiring to determine the pinout of the QWIIC connector. Figure 3 shows the connections and the QWIIC adapter cable.
MicroPython & Thonny Python IDE
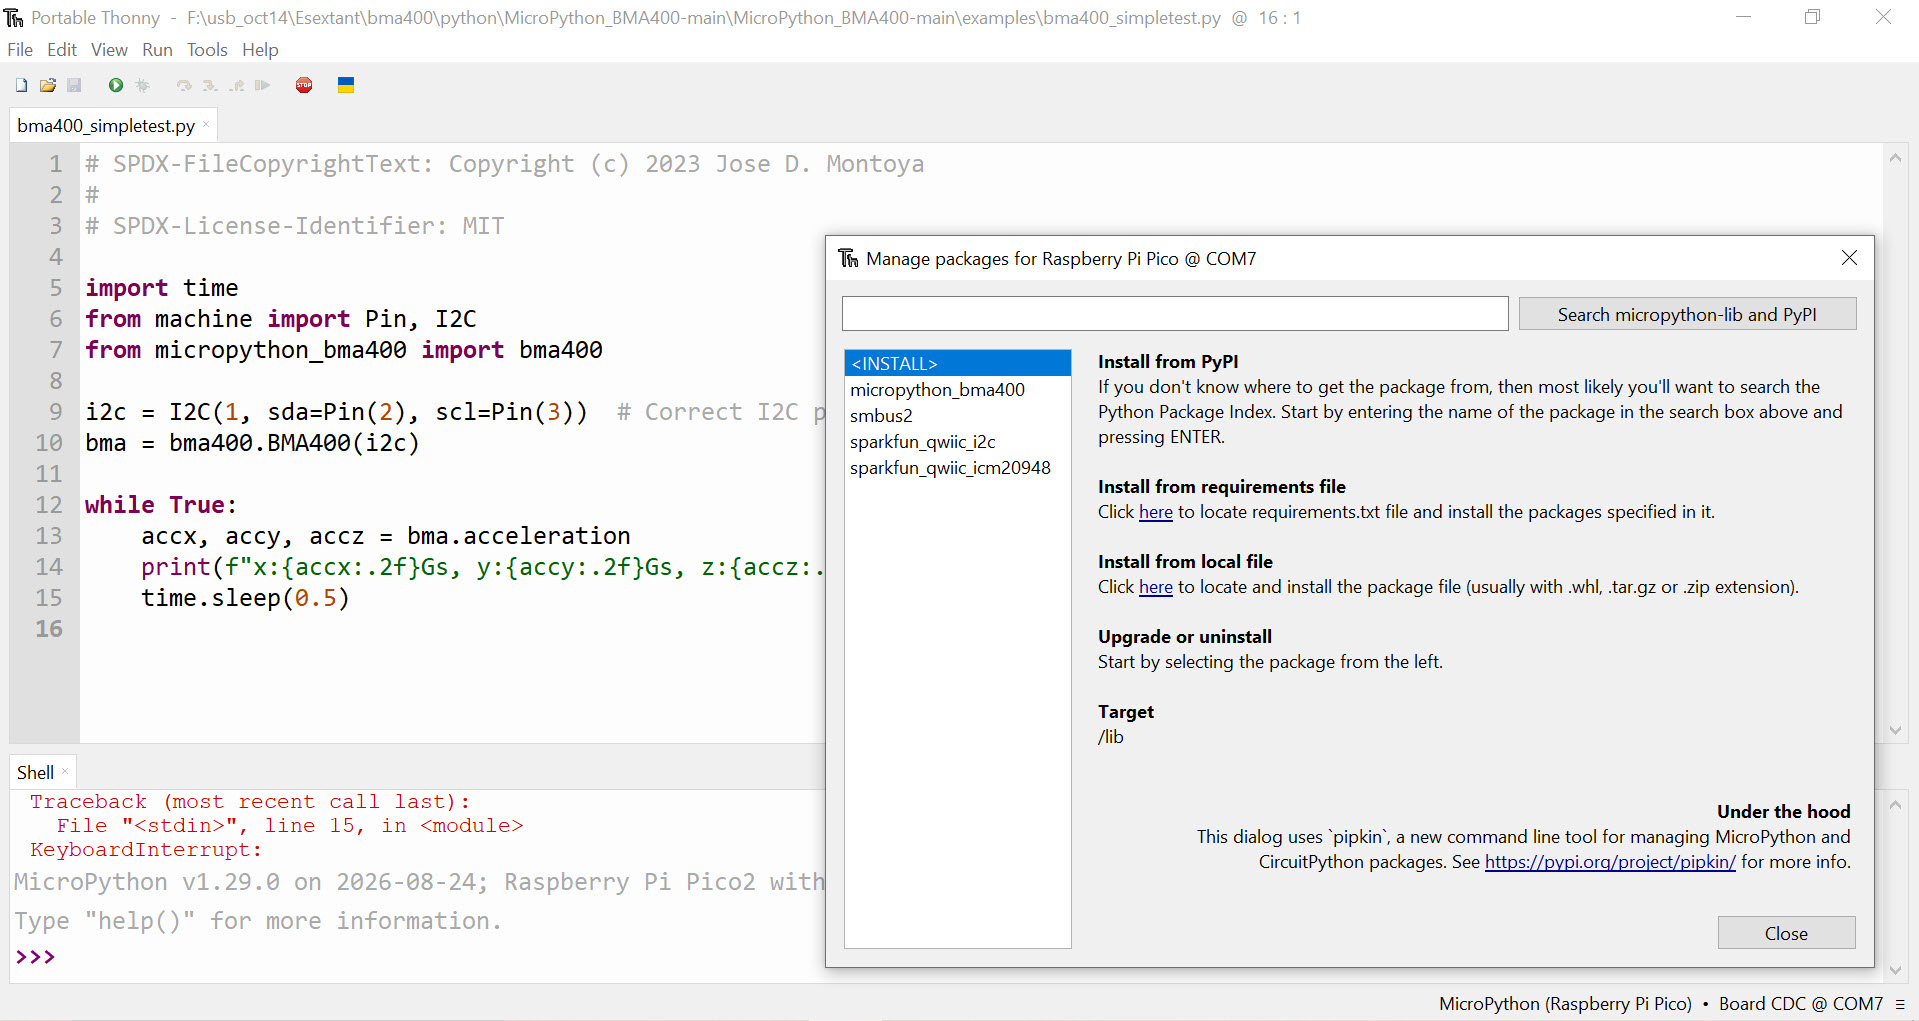
First step is to download and install MicroPython on the Pico 2. This was covered in the previous post (Ref.1). The BMA400 dev board comes with an Arduino library but not a MicroPython one. The manufacturer Bosch has a C API driver. Searching on the Internet I found a MicroPython libary at pypi.org “micropython-bma400 0.1.2” (Ref.3). Download the zip file and install in Thonny as in Figure 4 using “Install from local file”.
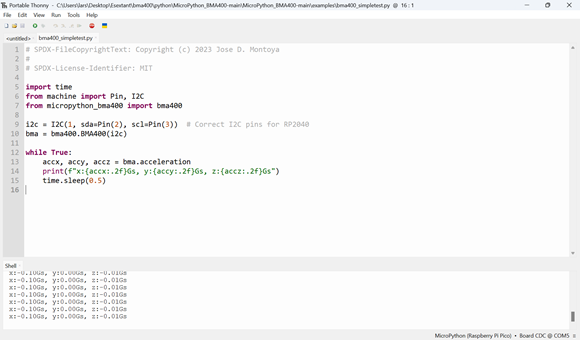
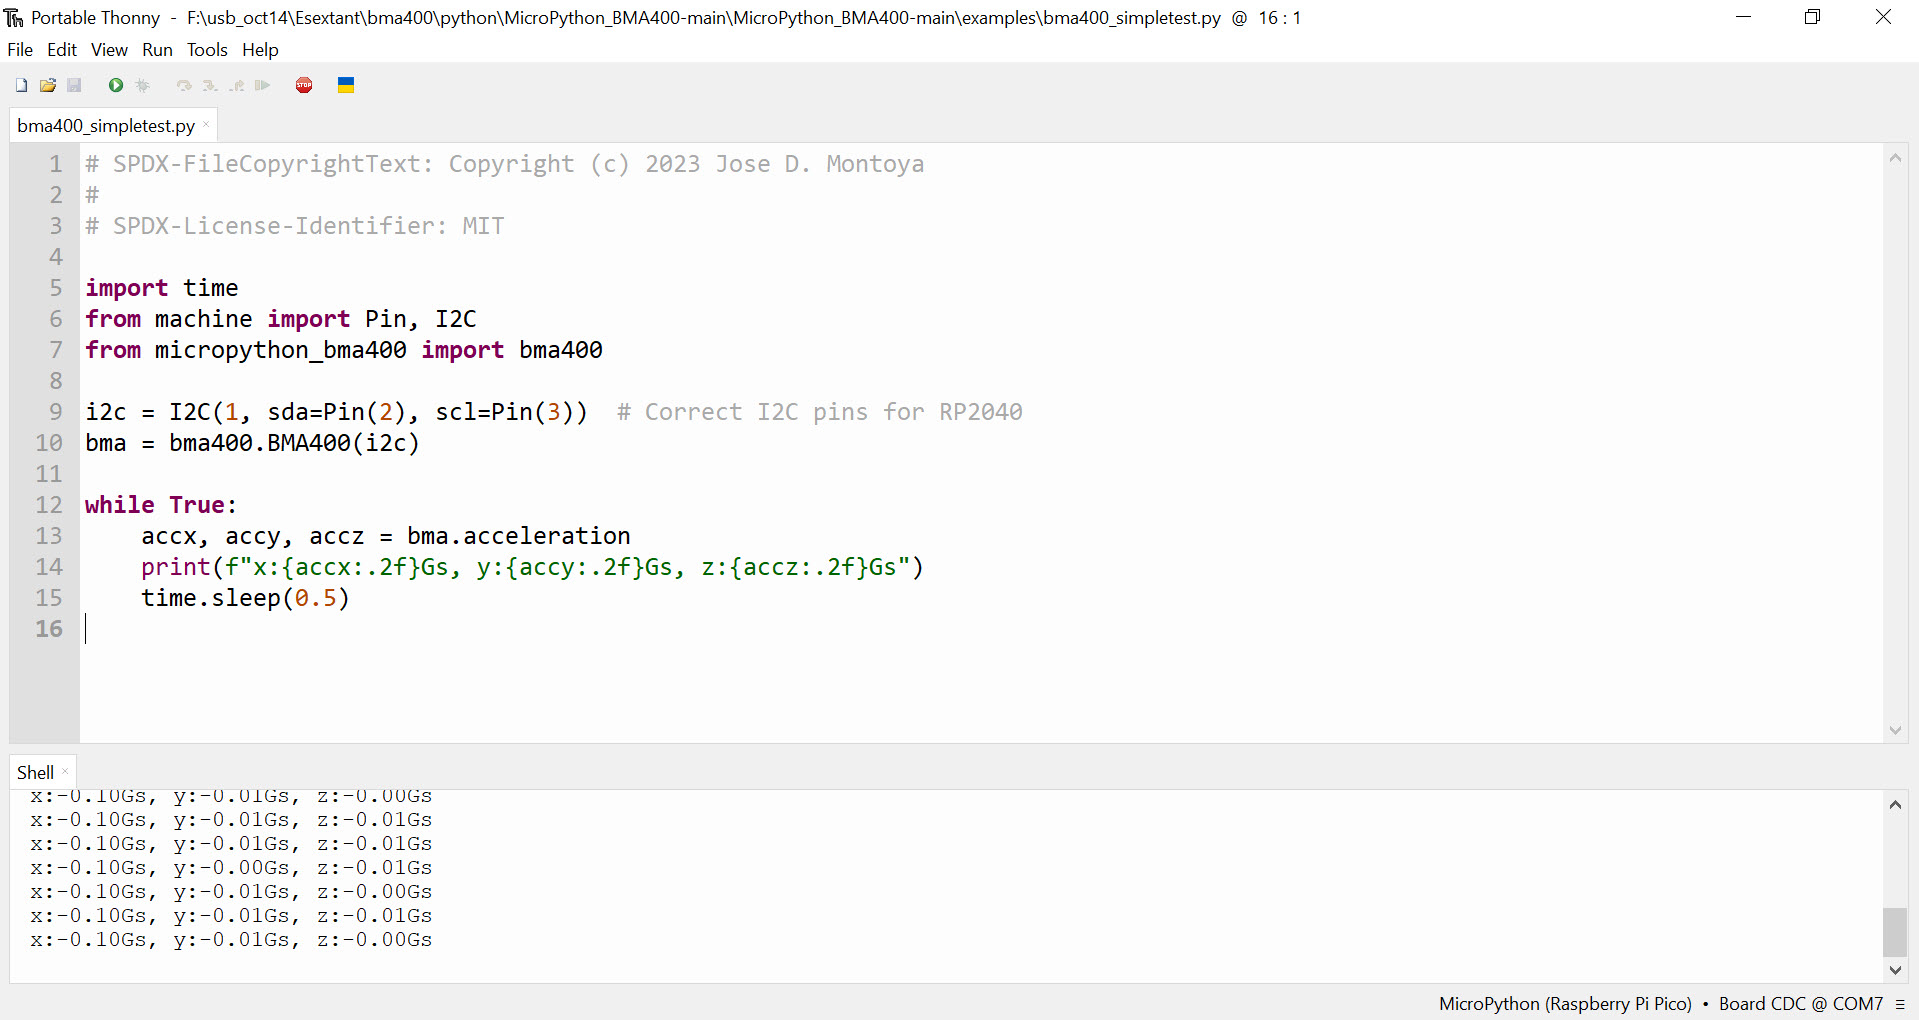
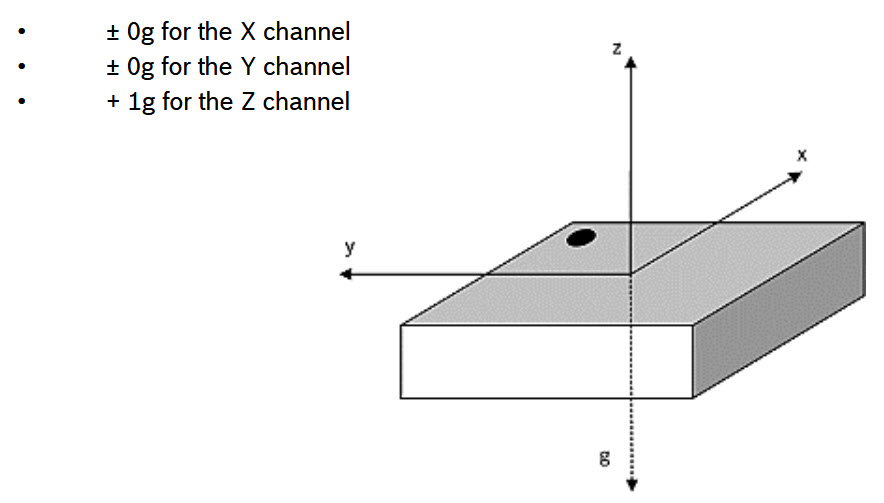
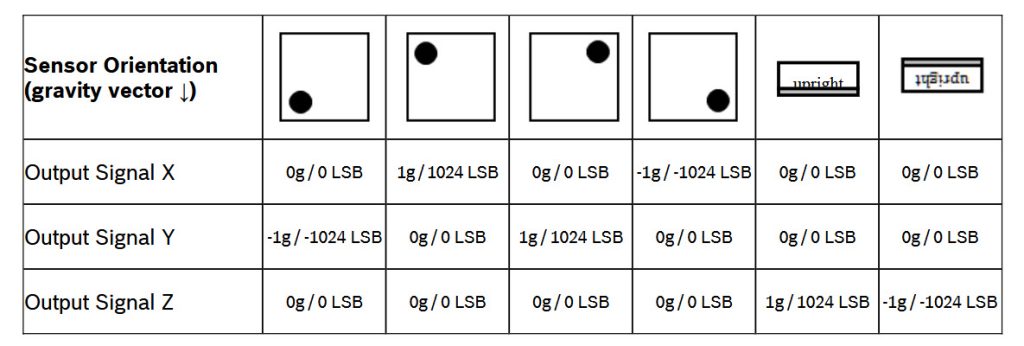
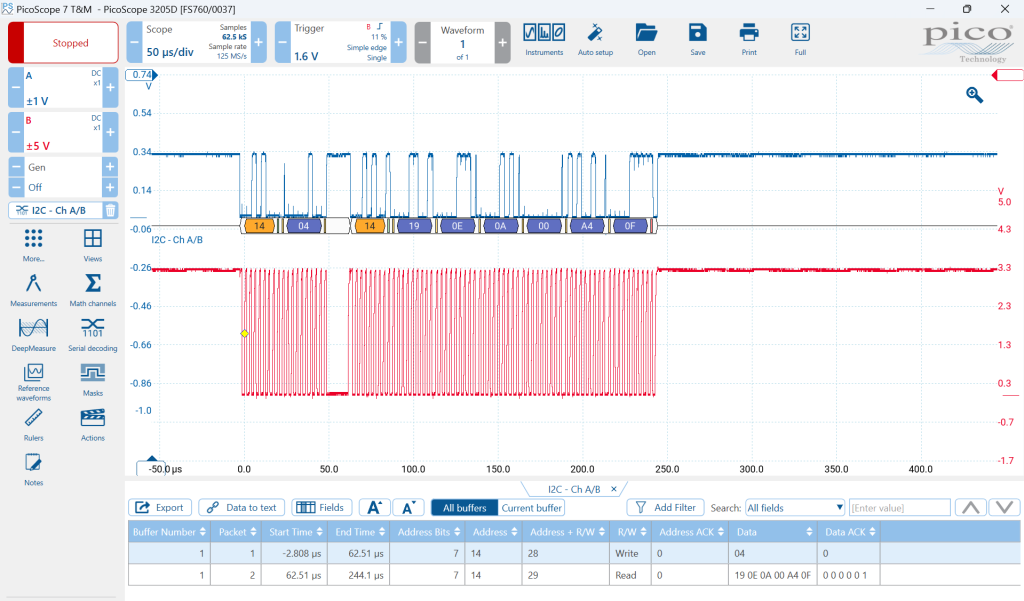
Figure 5 shows the “bma400_simpletest.py” example running with the output displayed below in the shell area. In the example, the sensor is vertical, so ax = -0.1Gs, ay = -0.01Gs, az = -0.01Gs. I presume Gs = 10xg where g = 9.81m/sec^2. Note on the pcb in Figure 2, the dot next to pin 1 on the sensor is on LHS of the bottom edge. Figures 6/7 show the orientation. Figure 8 shows the I2C communication SDA/SCL on pin4/5.
Please send your comments, questions and suggestions to:
contact:

References
#1. – “ICM20948 9DOF IMU on Raspberry Pi Pico 2”
https://jeremyclark.ca/wp/nav/icm20948-9dof-imu-on-raspberry-pi-pico-2/
#2. – “SparkFun Micro Triple Axis Accelerometer Breakout – BMA400 (Qwiic)”
https://www.sparkfun.com/sparkfun-micro-triple-axis-accelerometer-breakout-bma400-qwiic.html
#3. – “MicroPython Library for BMA400”
https://pypi.org/project/micropython-bma400/
#4. – “Bosch Data Sheet BMA400”
https://www.bosch-sensortec.com/en/products/motion-sensors/accelerometers/bma400
